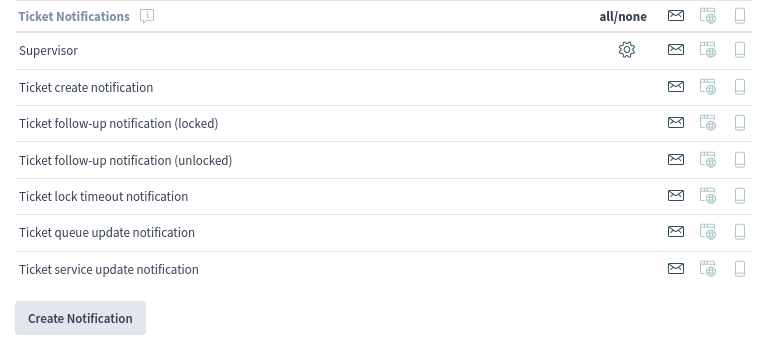
This package extends the Ticket Notifications widget in the Notification Settings menu item of the Personalization menu.
Notification Settings
Every agent who is a member of the group custom_notifications is able to create specific ticket notifications. The Create Notification button in the bottom of the Ticket Notifications widget points to the Ticket Notifications screen of the administrator interface.

To add a personal ticket notification:
-
Click on the Create Notification button and login to the administrator interface with your password.
-
Click on the Add Notification button as an agent or on the Add personal notification button as an administrator in the left sidebar if the Add Notification screen is not opened.
-
Fill in the required fields.
-
Click on the Save button.
The Ticket Notification Management screen does not contain the administrative elements, if an agent opens it.

To edit a personal ticket notification:
-
Click on a ticket notification in the list of ticket notifications. If you are an administrator, the personal ticket notifications are displayed in orange rows.
-
Modify the fields.
-
Click on the Save or Save and finish button.
Alternatively the agent can use the gear icon in the ticket notification list from the agent interface. This icon provides a direct link to the specific ticket notification to be edited.
To delete a personal ticket notification:
-
Click on the trash icon in the list of ticket notifications.
-
Click on the Confirm button.
The agent is able to create his own notifications, like administrators can do, except the recipient addresses. Every event that an agent creates, will send emails to its own primary email. This recipient address is mandatory and cannot be switched to another one.
The related agent is only able to see, create, edit and/or delete his own notification entries. It is not possible to see or modify notification entries of other agents.

