Most OTRS front ends support automation via custom URL addresses, whether for specifying configuration parameters, or automating forms. This mechanism can be used to integrate OTRS easily into existing workflows, or just provide a quick pre-configured overview of objects. There is no limit to number of use-cases.
Triggering Actions
Actions in the agent interface can be automatically triggered via a special URL parameter called TriggerAction. The approach outlined below works for any action which is registered for the current screen.
For example, let’s trigger the Change Free Fields action available in the ticket detail view.
-
Identify the slug name of the view in question. For the ticket detail view and the ticket with ID 1 this is:
/agent/ticket/1
You can access the ticket via the ticket number which will redirect you to the slug name of the view. If the ticket with ID 1 has the ticket number 2022042710123456 you can use this:
/agent/ticket/number/2022042710123456
-
Identify the
BusinessObjectTypeof the screen where the action should be triggered. In our case, for the ticket detail view, this is:Ticket
-
Go to System Configuration in the administrator interface and search for the action registration setting in question. In our case this is:
AgentFrontend::Ticket::Action###FreeText
-
Identify the value of the
Componentkey in the setting, which is the name of the front end component. In our case this is:TicketFreeText
-
Construct the action identifier in form of
<BusinessObjectType>::<Component>. In our case, this is:Ticket::TicketFreeText
-
Append a query parameter to the URL of the detail view named
TriggerAction, and set it to the action identifier, which is the value constructed in the previous step:/agent/ticket/1?TriggerAction=Ticket%3A%3ATicketFreeText
Note
In case of custom URL query parameter values, we have to take care to encode all special characters that are normally used in URLs (e.g. double quotes). This process is called “URL encoding”, and can be done by any of freely available on-line tools, like the Online Text Tools.
When visiting the URL as constructed above, the action will be automatically triggered:
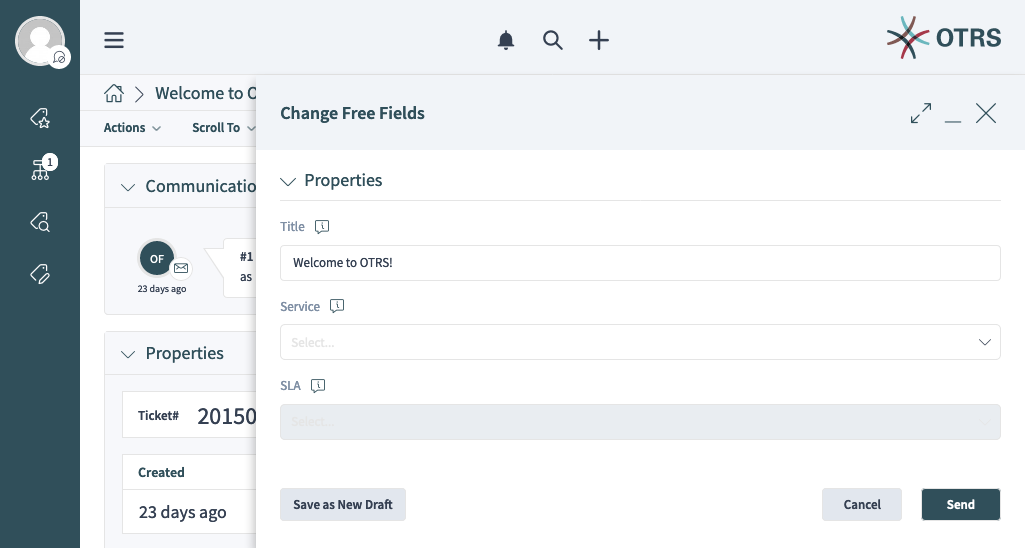
Note
Please keep in mind that any restrictions applied to the regular screen actions will still be honored. For example, you will not be able to trigger an action which is currently not accessible, e.g. because you don’t have permissions to it, or it was filtered out by the ACL rules in effect.
Pre-populating Form Fields
OTRS form fields can be pre-populated with values supplied via URL query parameters. The approach outlined below works for any form in the agent and external interface.
For example, let’s see how we can pre-populate the Title field of the Change Free Fields action form, which we triggered in the previous example.
Since this action is not initially shown on the screen, we will keep the trigger action parameter in place, and just add on to it:
/agent/ticket/1?TriggerAction=Ticket%3A%3ATicketFreeText
-
Identify the name of the form field in question.
In our case, we are dealing with the following form:
Forms###AgentFrontend::Ticket::Action::FreeText
According to the form fields reference, field is aptly named:
Title
-
Append a query parameter to the URL of the detail view with the name of the field, and set it to the desired value:
/agent/ticket/1?TriggerAction=Ticket%3A%3ATicketFreeText&Title=Some+text
Note
Additional URL query parameters can be chained with an ampersand character (
&).Note
In case of custom URL query parameter values, we have to take care to encode all special characters that are normally used in URLs (e.g. double quotes). This process is called “URL encoding”, and can be done by any of freely available on-line tools, like the Online Text Tools.
When visiting the URL as constructed above, the action will be automatically triggered and the field pre-populated:
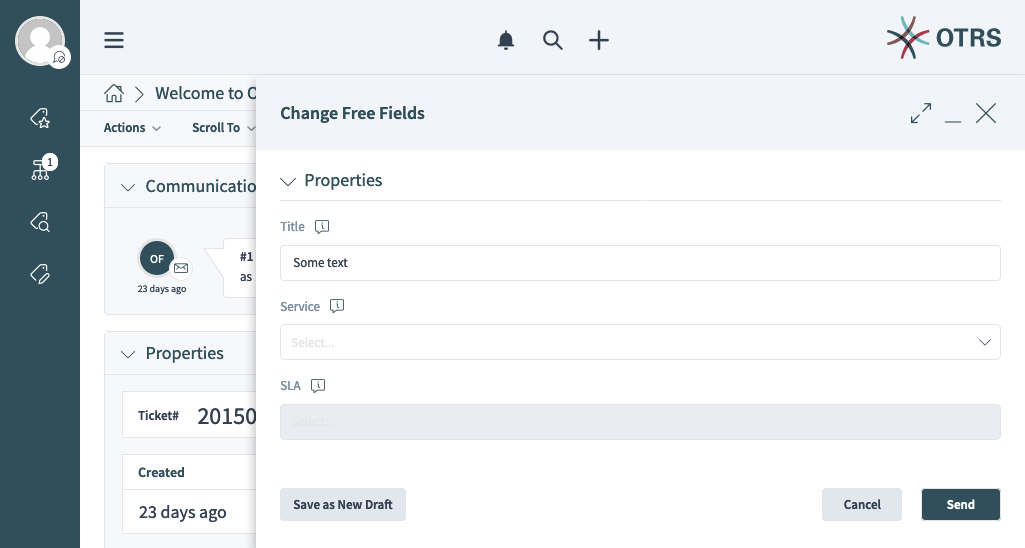
The approach can be repeated for all other fields in the form, for example, if we would also like to set the Service field (field name ServiceID) to a hypothetical value Service 2 with an ID of 2, we can add it to the existing URL like this:
/agent/ticket/1?TriggerAction=Ticket%3A%3ATicketFreeText&Title=Some+text&ServiceID=2
When visiting the URL as constructed above, the action will be automatically triggered and both fields pre-populated:
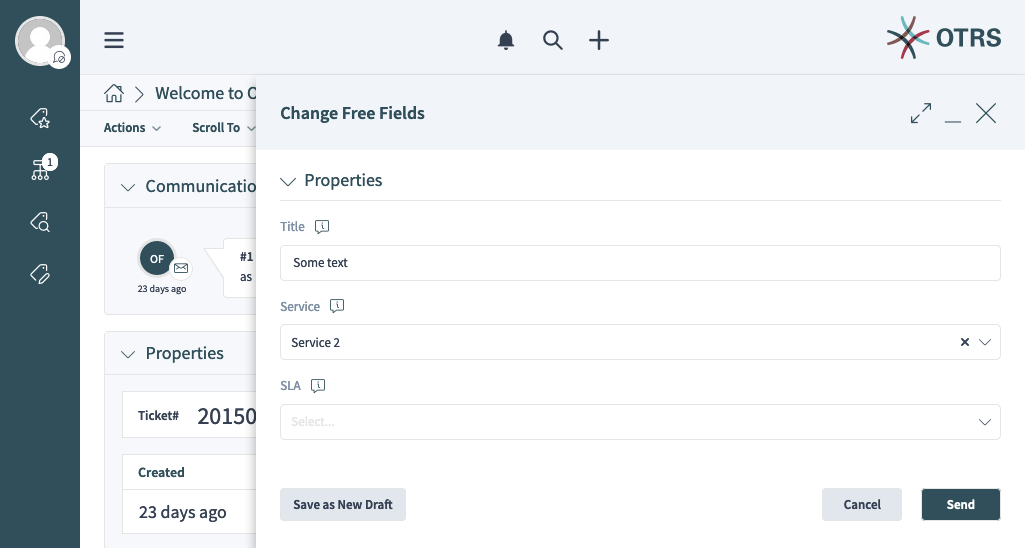
Pre-populated Title and Service Fields of the Change Free Fields Action
Note
In case of most drop-down fields that contain business objects (e.g. services, queues, etc.), you must always provide the ID of the object, not its label. You can recognize these form fields by the ID suffix in their name. You should always do a lookup of the object ID value, and set the field to it.
Note
Please keep in mind that any restrictions applied to the regular action form fields will still be honored. For example, you will not be able to set a value to a disabled field, or select an option which was filtered out by the ACL rules in effect.
Submitting Actions
Actions in the agent interface can be automatically submitted by via a special URL parameter called SubmitForm. The approach outlined below works for any action which is registered for the current screen.
For example, let’s see how we can submit the Change Free Fields action form, which we already triggered and pre-populated in previous examples.
Since this action is not initially shown on the screen, we will keep the trigger action parameter in place, as well as some form field parameters, and just add on to it:
/agent/ticket/1?TriggerAction=Ticket%3A%3ATicketFreeText&Title=Some+text&ServiceID=2
Append a query parameter to the URL of the detail view named SubmitForm and set 1 as its value:
/agent/ticket/1?TriggerAction=Ticket%3A%3ATicketFreeText&Title=Some+text&ServiceID=2&SubmitForm=1
When visiting the URL as constructed above, the action will be automatically triggered, both fields pre-populated and the action immediately submitted:
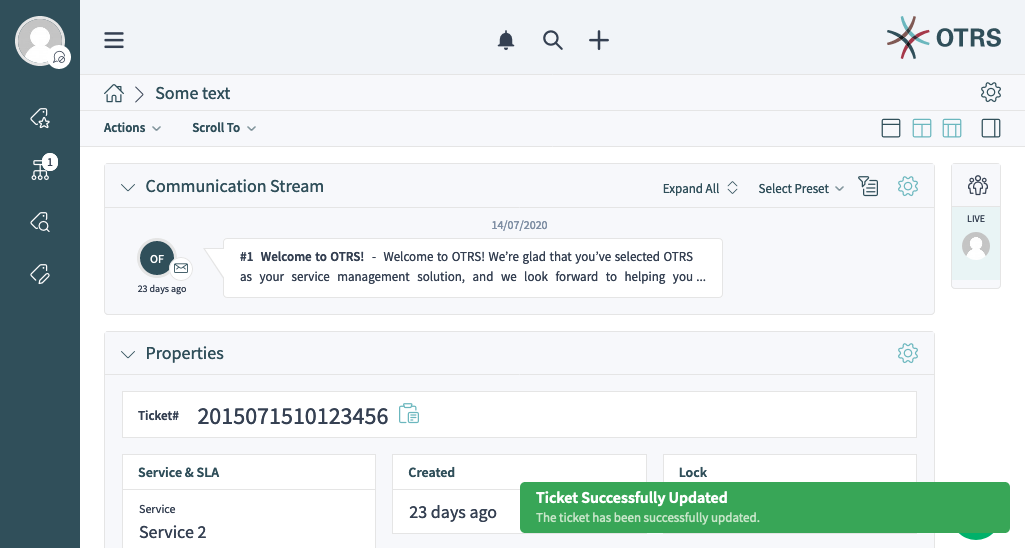
Note
Please keep in mind that any restrictions applied to the regular action forms will still be honored. For example, you will not be able to submit an invalid form by omitting a mandatory field, or setting a field to an invalid value.
Custom Business Object Lists
All static business object lists in the agent interface support custom configuration via a special URL parameter called Config. The approach outlined below works for similar screens which are listed in the following section, and for any keys documented in the YAML reference.
For example, let’s see how we can set an active filter preset for a business object list by carefully constructing a direct URL for the view.
-
Identify the slug name of the view in question. We will be using
AgentFrontend::TicketList::Staticwhich has the slug:/agent/tickets/static
-
Go to System Configuration in the administrator interface and search for the screen configuration setting in question, in our case this is:
AgentFrontend::TicketList::Static###DefaultConfig
-
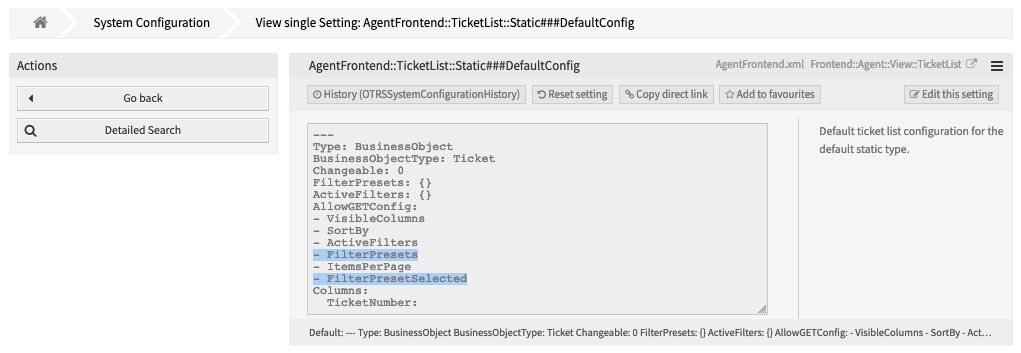
Make sure that the key
AllowGETConfigin the screen configuration contains the propertiesFilterPresetsandFilterPresetSelected, which we will pass via the query parameter.To be able change these keys, they must present in the list, otherwise they will be ignored. For more information, please see the key reference.
-
Construct a valid YAML configuration that defines a user-defined filter preset and sets it as pre-selected.
---
FilterPresets:
  "Total Tickets":
    CustomerID:
      Value: my-customer@otrs.com
FilterPresetSelected: "Total Tickets"
-
Convert the YAML structure from previous step into JSON syntax, since YAML is unsuitable for passing via parameters. If we do this, we get the following analogous structure.
{
   "FilterPresets": {
      "TotalTickets": {
         "CustomerID": {
            "Value": "my-customer@otrs.com"
         }
      }
   },
   "FilterPresetSelected": "Total Tickets"
}
-
Remove all the extra white space to compress this configuration into a single line.
{"FilterPresets":{"Total Tickets":{"CustomerID":{"Value":"my-customer@otrs.com"}}},"FilterPresetSelected":"Total Tickets"}
-
To pass the configuration to the screen located at
/agent/tickets/static, we just need to define an URL query parameter namedConfigand set the JSON structure above as its value.Note
In case of custom URL query parameter values, we have to take care to encode all special characters that are normally used in URLs (e.g. double quotes). This process is called “URL encoding”, and can be done by any of freely available on-line tools, like the Online Text Tools.
/agent/tickets/static?Config=%7B%22FilterPresets%22%3A%7B%22Total%20Tickets%22%3A%7B%22CustomerID%22%3A%7B%22Value%22%3A%22my-customer%40otrs.com%22%7D%7D%7D%2C%22FilterPresetSelected%22%3A%22Total%20Tickets%22%7D

Example of the Filter Preset Defined via URL Query Parameter
Note
Did you know that you can use many freely available on-line tools to do the conversion steps outlined above? Some of them even support chaining, like the Online YAML Tools for the example above.

